REVIEW · MAUI
Epoxy Resin Cheese Board Art Class
Book on Viator →Operated by Yulia Maui Art · Bookable on Viator
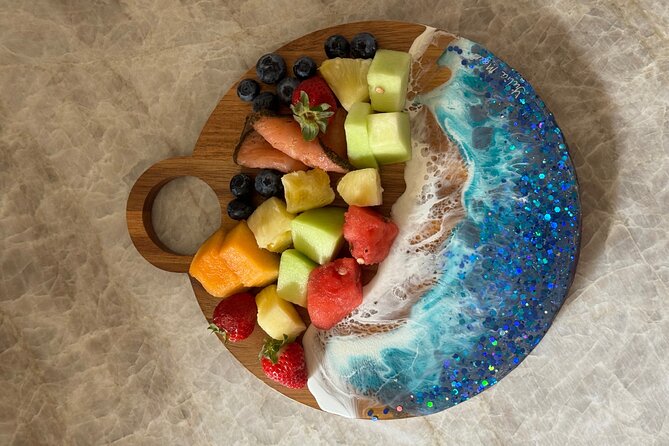
A cheese board you make yourself feels extra Maui. This hands-on epoxy resin class in Paia turns ocean-inspired resin art into something you can set out this weekend, with a smaller practice piece first so you learn fast. You’ll work through the full process, from board prep to mixing pigments and pouring, with safety gear provided and real guidance along the way from the team at Yulia Maui Art.
I especially like that you make both a mini practice board and a full-size serving board. That two-step approach helps you understand resin behavior before you commit. I also like the practical finish-and-care focus, so you’re not just leaving with art—you’re leaving with serving ware you’ll know how to treat.
One consideration: your finished piece needs 24 hours to cure, so you’ll plan on collecting it the next day rather than taking it home immediately.
In This Review
- Key Things to Know Before You Go
- Turning Resin Into a Maui Souvenir You’ll Use
- What You’ll Make: Full Cheese Board Plus a Mini Practice Piece
- The Class Flow: Prep, Pigments, Pouring, and Finishing
- Safety and prep come first
- Measuring, mixing, and coloring
- Pouring and using a heat gun and torch
- Board preparation: cleaning, taping, leveling
- Finishing and aftercare
- The Maui Part: Paia and Ho‘okipa Beach Park Stops
- What’s Included (and What That Means for Your Wallet)
- Group Size and Instruction Style: Hands-On Without Feeling Chaotic
- Practical Tips: How to Get the Best Resin Result
- Think about your board shape before you go
- Wear clothes you don’t mind protecting
- Treat curing time like part of the plan
- Who Should Book This Class
- Should You Book the Epoxy Resin Cheese Board Class in Maui?
- FAQ
- FAQ
- Where does the epoxy resin cheese board class start?
- How long is the class?
- What do I make during the class?
- What’s the resin curing time?
- Is alcohol included?
- Does the class provide safety gear?
- Are special board shapes included?
- How many people are in the group?
- What language is the class taught in?
- Is there free cancellation?
Key Things to Know Before You Go
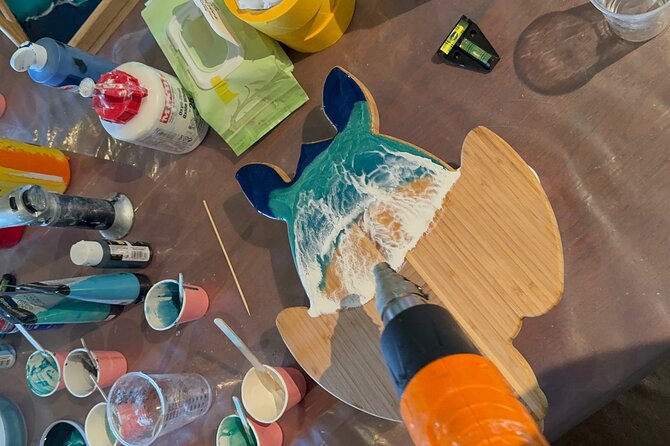
- Mini practice board first so your full pour is less intimidating
- PPE provided (gloves, aprons, and other safety gear)
- Ocean resin workflow taught step-by-step: measure, mix, color, pour
- Heat gun and torch skills are part of the lesson, not an afterthought
- Next-day pickup because the serving board cures overnight
- Maximum 12 people keeps the class hands-on and not rushed
Turning Resin Into a Maui Souvenir You’ll Use
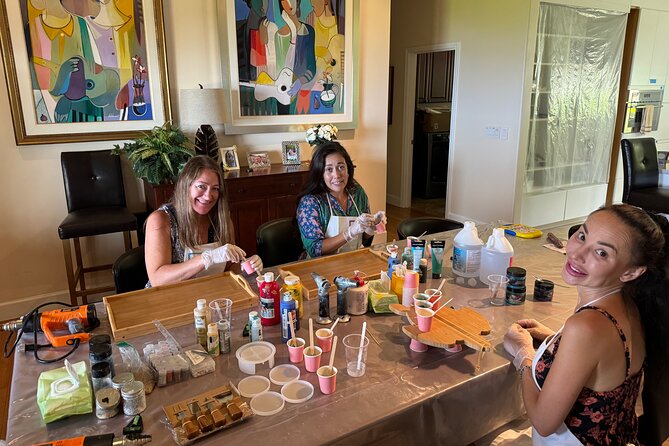
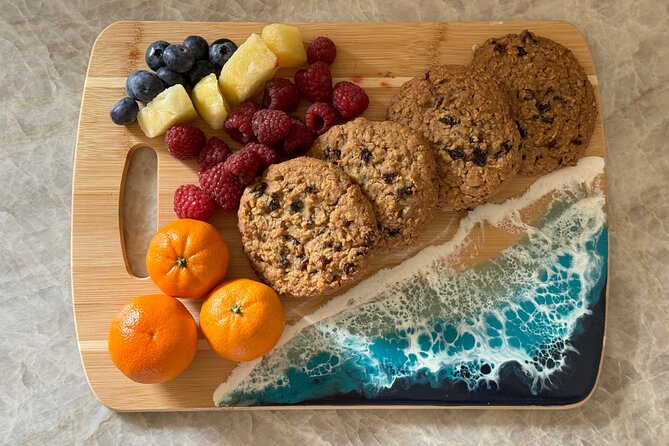
Epoxy resin classes can be fun, but the good ones give you skills—not just a pretty result. This one stands out because the end product is a real serving piece: a cheese board designed for weekend entertaining or gifting. You’re learning how to create an ocean resin look, then applying it to a surface meant for everyday use (with the right care).
You’ll start with the idea of hosting—antipasto, cheese, charcuterie, snacks—then you’ll actually build the board that makes that hosting easier. It’s art, yes, but it’s also practical. And because it’s personalized, it’s the kind of souvenir that stays useful long after your flight lands.
The pace also feels right for visitors. The class is short at about 1 hour 30 minutes, but it covers the full workflow so you understand what’s happening at each stage: measuring, mixing, pigment choices, pouring technique, finishing, and care.
What You’ll Make: Full Cheese Board Plus a Mini Practice Piece
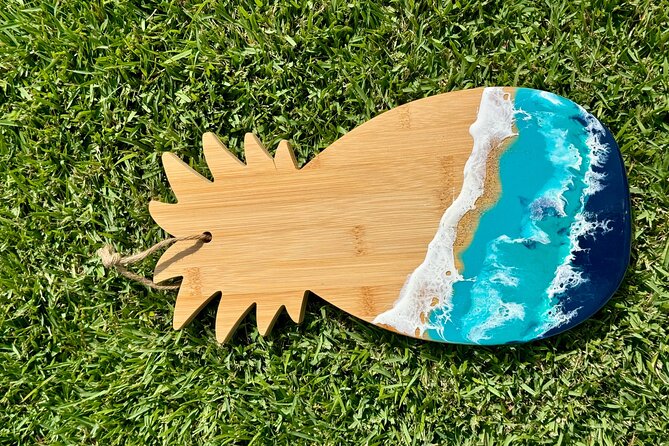
You’ll make two resin items:
- A cheese board (the main project)
- A mini cheese board to practice techniques you’ll use later
That mini board detail matters more than it sounds. Resin work can feel mysterious until you see how the material behaves when you mix colors, pour, and manage surface effects. Practicing first helps you adjust your expectations and your technique before the final pour.
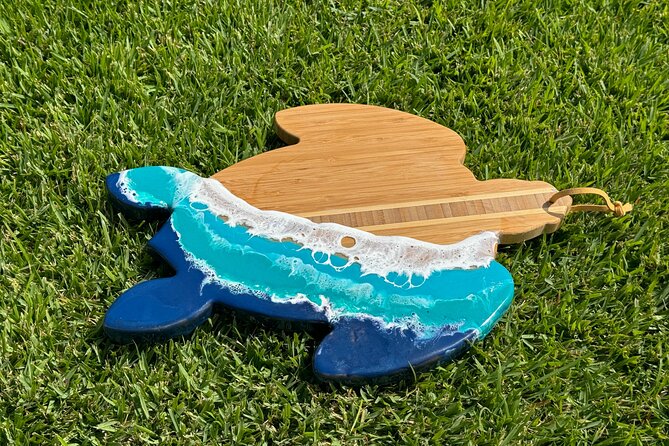
About the board shape: you’re encouraged to use your own shape if you want something that fits your home display. If you want a special board shape, that’s described as an upgrade option available at class time. If you’re the type who likes choices, show up with an idea of what you want to display later—round, rectangle, organic edge, whatever suits your space.
Your final serving ware is set up for next-day pickup. The curing time is built into the experience: after you finish, the board needs about 24 hours to cure before collection.
The Class Flow: Prep, Pigments, Pouring, and Finishing
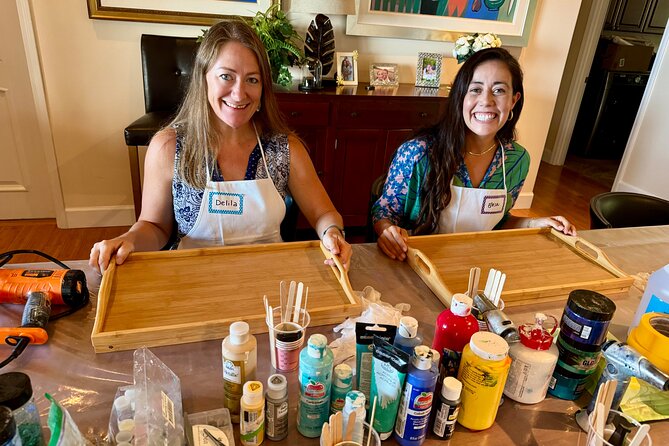
This class teaches the whole process, not just the fun part. Here’s what you’ll be working through.
Safety and prep come first
You’ll begin with gloves, aprons, and other PPE included. That’s a good sign. Resin work is messy by nature, and safety should be standard, not optional. You’ll also get safety and preparation tips, which matters because getting ready correctly is what helps your pour come out clean instead of chaotic.
Measuring, mixing, and coloring
You’ll learn how to:
- measure resin
- mix it properly
- add color and pigments
- blend colors to get your look
If you’ve ever watched resin videos online and thought, that seems too simple, this is where the reality check happens—in a useful way. Resin only works right if your measurements and mixing are correct. Color isn’t just “add pigment and hope.” You’ll get guidance on choosing the right pigments and blending colors to get controlled results.
Pouring and using a heat gun and torch
The class covers how to work with a heat gun and torch. Those tools are often shown in resin clips as magic cleanup buttons. In real life, they’re more like precision instruments. The goal is to manage the surface and help create a smooth, polished effect on your pour.
This is also one of those spots where learning-by-doing beats reading about it. Even if you’re a quick learner, you still need muscle memory for timing and technique. The class is built so you practice the steps rather than just watch.
Board preparation: cleaning, taping, leveling
You’ll also learn how to prepare your board properly, including:
- cleaning
- taping
- leveling
This part is where many home resin projects go off track. Uneven surfaces and poor prep create problems you can’t “fix in finishing.” Learning the setup helps you understand why your final result looks professional instead of wavy or messy.
Finishing and aftercare
Finally, you’ll learn how to finish the pieces professionally and how to look after your new serving ware. That care guidance is important because resin art isn’t just about getting it shiny once. You want it to stay nice—especially if you’ll actually use it for food presentation, and especially if it’s going to live in real-world kitchens.
The Maui Part: Paia and Ho‘okipa Beach Park Stops
This experience includes two stops: Paia and Ho‘okipa Beach Park. The class itself centers on resin work, but the locations matter because they shape the vibe.
Paia is the type of town that feels like a real basecamp. It’s not just a drop-off point; it’s a place where people actually walk around and spend time. Starting your class near 24 Luna Ln, Paia, HI 96779 also makes it easy to fit into a day in this side of Maui without feeling like you’re sprinting across the island.
Ho‘okipa Beach Park is all about big ocean energy. Even when the ocean isn’t the main “activity,” it helps you get into the right mindset for an ocean-themed resin board. You’re learning ocean art and then seeing the ocean in person—way more satisfying than doing the project with your imagination alone.
A practical note: the experience duration is about 1 hour 30 minutes, so you’re not spending all day sightseeing. Think of it as a focused hands-on activity with scenic context built in.
What’s Included (and What That Means for Your Wallet)
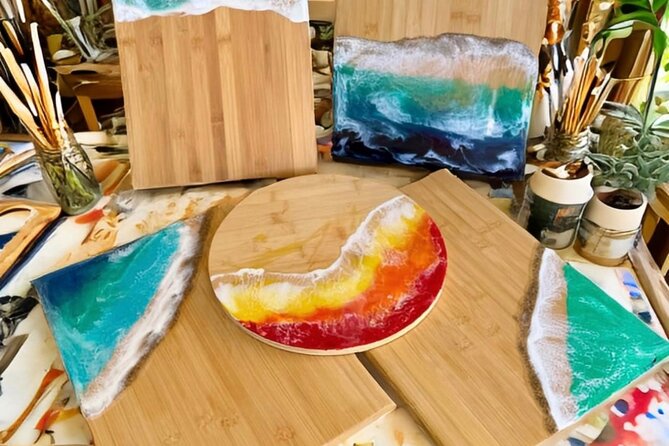
For $145 per person, you’re not just paying for the resin art idea. You’re paying for the materials and instruction that make the process doable.
Included items:
- Resin cheese board
- Charcuterie board
- Chopping board
- Bottled water and juice (and you can BYOB)
Also included:
- PPE (gloves, aprons, and other safety gear)
- The instruction covering mixing, pigments, heat gun/torch use, board prep, finishing, and care
- A mini board practice piece
What’s not included:
- Alcohol
- A special board shape (described as an upgrade available at class time)
So is $145 worth it? For most people, it makes sense if you value two things:
- Guided resin skills instead of trial-and-error at home
- A set of practical boards you can actually use (not just one coaster-sized piece)
If you’re the type who wants to experiment with pigment blending and surface effects, the instruction saves you time and prevents waste. Resin materials can be pricey, and mistakes can get expensive fast. Here, the class gives you a structured process and a finished result you can collect the next day.
Group Size and Instruction Style: Hands-On Without Feeling Chaotic
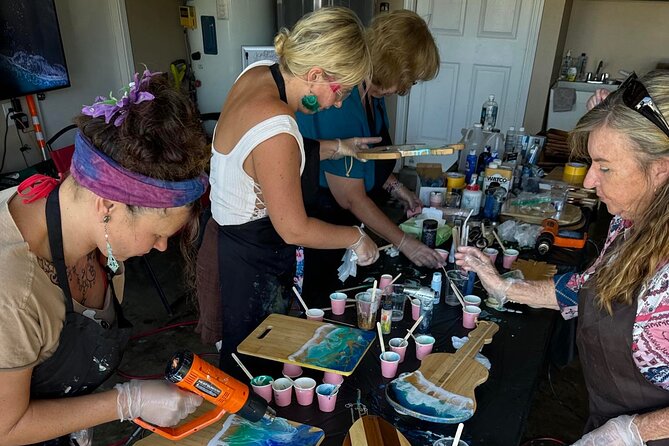
The class has a maximum of 12 travelers, which is the sweet spot for a small workshop. It’s big enough that you’ll likely meet other people and share the excitement, but small enough that the instructor can help when you need it.
That support piece shows up clearly in the tone of the experience. The instruction is described as friendly and step-by-step, with help at every stage. When you’re working with mixing ratios, pigments, and surface tools, that kind of attention matters. One small correction can mean the difference between a flat, messy surface and a clean, professional-looking finish.
Practical Tips: How to Get the Best Resin Result
Even without getting overly technical, you can set yourself up for success with a few smart moves.
Think about your board shape before you go
If you want a specific look at home, decide what shape you want to display and bring that idea with you. The class allows bringing your own shape for the cheese board display. If you’d rather not plan ahead, you can still go in with flexibility and ask about available special shapes for an upgrade at class time.
Wear clothes you don’t mind protecting
PPE includes an apron and gloves, but resin can still be a story about spills and smudges. Plan for clothes that are okay if they pick up a little mess risk.
Treat curing time like part of the plan
Because your board needs 24 hours to cure, don’t plan on picking it up the same day you pour it. Make sure you have space in your schedule for next-day collection.
Who Should Book This Class
This experience is a strong match if you:
- want a hands-on Maui activity that creates something you’ll use
- like ocean-inspired art styles and color mixing
- enjoy learning practical skills, not just taking a photo
- want a gift that’s personal and made by you
You might skip it if you:
- hate waiting for cured pieces and need instant take-home souvenirs
- are looking for a purely sightseeing-focused excursion
- expect a fully self-directed DIY session with no instruction
Should You Book the Epoxy Resin Cheese Board Class in Maui?
If you want a Maui souvenir that won’t end up in a drawer, I’d book this. You’re making a functional cheese/charcuterie setup, and you’re learning the steps behind the look—prep, pigments, pouring, heat gun/torch technique, finishing, and aftercare. That’s the difference between a nice craft day and a skill you can reuse.
The price can feel high at first glance, but when you consider what’s included (boards, PPE, instruction, and multiple resin pieces), it lands in the category of “worth it if you’ll actually use the result.” And with a small group size and real help throughout the process, it’s also a low-stress way to try resin without going in blind.
FAQ
FAQ
Where does the epoxy resin cheese board class start?
The start location is 24 Luna Ln, Paia, HI 96779, USA.
How long is the class?
It lasts about 1 hour 30 minutes.
What do I make during the class?
You’ll make a cheese board and a mini cheese board for practice.
What’s the resin curing time?
Your serving ware needs about 24 hours to cure and will be ready for collection the next day.
Is alcohol included?
No. Alcohol is not included, but you can BYOB.
Does the class provide safety gear?
Yes. Gloves, aprons, and other PPE are included.
Are special board shapes included?
Special board shapes are not included. You can bring your own shape to display, and special shapes may be available for an upgrade at class time.
How many people are in the group?
The class has a maximum of 12 travelers.
What language is the class taught in?
The class is offered in English.
Is there free cancellation?
Yes. You can cancel for a full refund up to 24 hours before the experience starts.